ClassKite How To Guides:
When you first setup your ClassKite, your site will have a placeholder class created when you start so that you can collect student information even before your classes are up. (This is useful for waitlists or early VIP signups!)
To add your own classes, click on “Classes” in your dashboard, then click “Create Class”.
General Information
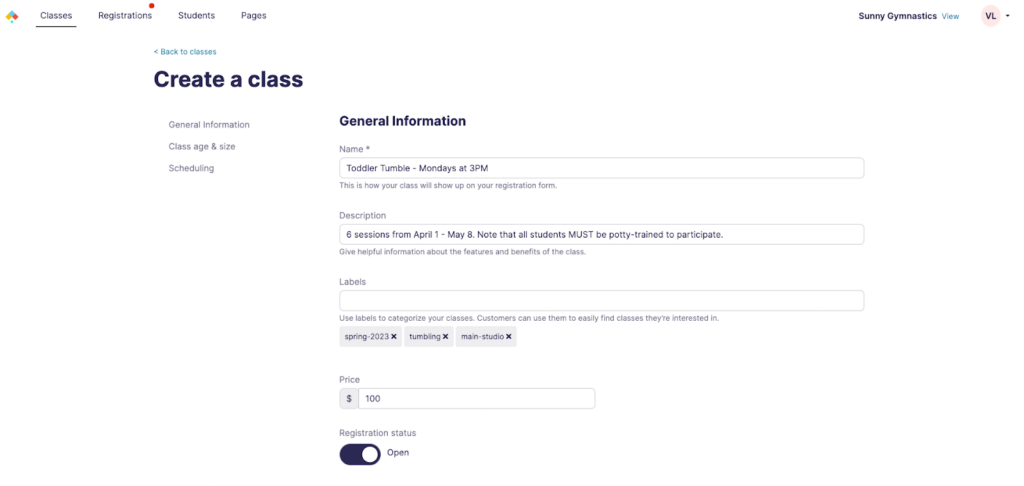
- Name: This is the class name that customers will see
- Description: Give helpful information about this specific class
- Labels: Enter labels to categorize your classes. Customers will use these to filter for classes. Labels are great for semester, location, and class type information.
- Price: This price field can only accept one-time prices as it does not currently accommodate recurring payments.
- Registration status: Flip this to “Open” once you are ready to accept registrations for this class!
Class age & size
- Ages: Enter the acceptable age range for this class. Note the “18+” option for grown up classes.
- Capacity: Enter the maximum number of students for this class. Note this is currently informational only and does not turn off registrations when the maximum capacity is reached.
Scheduling
- Day of the week: What day of the week does the class take place?
- Start time: When does the class start?
- Duration: How long is the class?
- Dates: When is the first and last date of the class?
Make sure to click “Create Class” to create the class. Now, you’ll be able to see the class you just created in the Active tab. (Classes will automatically be moved to the Inactive tab when the last date of the class has passed.)
You can click into the class now to edit details again, or to switch registrations open or closed.
Next, learn how to customize your registration form.